The Axle Shot Network, by ini of Cooliniau
The Axle Shot Network (ASN) is an offensive & evasive mobility subsystem made within Foreign Input System —which focused on expanding the combo capabilities of the Werehog. These two elements are showcased with the Ricochet System & Traversal System respectively: the former leading to pinball-esque attacks, and the latter leading to a different means of on-field & in-combat traversal.
Ways to access ASN...
(Base & Unleash) While in combos:
-
Double Axle Combo:
 →
→
 →
(Hold)
→
(Hold)

- PlayStation:
 →
→
 →
(Hold)
→
(Hold)

- PlayStation:
-
Tricky Tornado Uppercut: (
 +
+
 DOWN
+
)
→
(Hold)
DOWN
+
)
→
(Hold)
-
Can press
/
again to initiate another Axle Homing Shot.
- PlayStation:
(
 +
+
 DOWN
+
)
→
(Hold)
DOWN
+
)
→
(Hold)
-
-
Unleashed Wild Combo:
→
→
→
→
→
(Hold)
-
Can press
/
again to initiate another Axle Homing Shot.
- PlayStation:
→
→
→
→
→
(Hold)
-
If you press
*
at
→
→
→
→
(
*
)
and miss the early on-hit Multi-Kick, you may be able to go into ASN late. - PlayStation:
*
at
→
→
→
→
(
*
)
-
During any Self-Launcher, press
/
or
 /
/
 to do either an Axle Dive or Spinning Ricochet Kick respectively.
- Air Level 2 (Self-Launch after a prior Launcher) can only do Axle Dive Lv. 2 with both "A" and "B".
During Diving Bodypress, press
/
or
/
to do either an Axle Dive or Ricochet Kick respectively.
Disclaimer: All of the footage presented here are produced from earlier builds of ASN—as such, any inconsistencies between this and the GameBanana release should be expected . Treat what you see here as examples of what to at least look out for when learning ASN. - ini
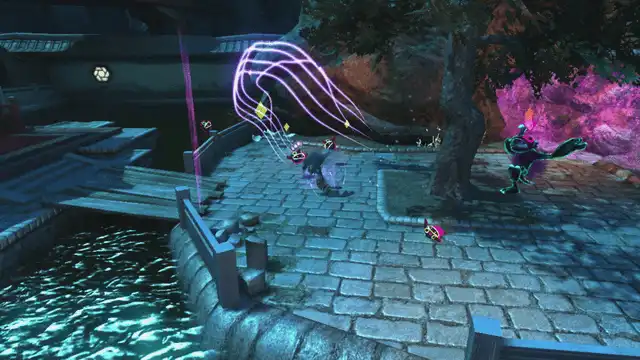
Ricochet System
Performing the Axle Homing Shot will send you straight into the Ricochet System. Inputs for each Axle Ricochet bounce are as follows:
Ricochet Lv. 1 - If you bounce once, on-hit:
(*UI = Unique Input)
-
/
= Flying Double Punch (1st UI)
-
/
= Aerial Claw Slash (1st UI)
-
/
= Altered Typhoon Finisher
-
Pressing
/
again initiates an Axle Dive Lv. 1, and another A press transitions into the Typhoon Finisher; sequence is
loopable on-hit
. -
Should the Axle Dive land on an enemy/object, you will re-activate the 1st R-Bounce, which you can simply let loose to see if you can get a HIGHER level mid-combat...
-
-
/
= Spinning Ricochet Kick Lv. 1
-
This allows for "extending" your reach of Richocet Lv. 1, purely to get a better chance at upgrading to Ricochet Lv. 2.
-
During this attack, your only other input to use would be
/
,
for Axle Dive (Recovery).
Ricochet Lv. 2 - If you bounce twice, on-hit:
[Camera will zoom out.]
(*UI = Unique Input)
-
/
= Shooting Star Combo (1st UI)
-
/
= Typhoon Combo (1st UI)
-
/
=
Altered Aerial Dive-Kick
-
This Dive-Kick has 2 parts to it: early & late. Early on-hit leads into an Altered Multi-Kick, and Late on-hit leads to an Uncurled Axle Bound.
-
Early / Late differences:
-
/
= 1st UI Rising Sweep (early) / Crescent Moon Strike Finisher (late)
-
/
= 1st UI Crossing Windmill (early) / Hurricance Combo Finisher (late)
-
/
= Uncurled Axle Bound
-
/
= Ricochet Kick
-
-
All of these offer ways to get back to the Ricochet System, but this time from your current position.
-
-
/
= Spinning Ricochet Kick Lv. 2
-
This allows for "extending" your reach of Richocet Lv. 2, for a better chance at upgrading to Ricochet Lv. 3.
-
During this attack, your only other input to use would be
/
,
still for Axle Dive (Recovery). -
By forfeiting the chance of upgrading to Ricochet Lv. 2, you will simply go into Axle Bound Recovery after the Axle Dive (Recovery), where
/
grants you Spinning Ricochet Kick Lv. 0.
Ricochet Lv. 3 - If you bounce thrice, on-hit:
[Camera will zoom out further & game will slow down temporarily.]
(*UI = Unique Input)
-
/
= Axle Dive Lv. 2
- On-hit, you will initiate the EX (Extra) Ricochet Mode.
- On-miss, you will initiate the Uncurled Axle Bound and its options.
-
/
= Typhoon Combo (1st UI)
-
/
=
Axle Homing Shot (Forward)
-
One of the 3 Chains to use the "Seven Rounds" mechanic, named "The Flying Snake".
-
This grants a taste of the Unleashed Axle Shot Network by allowing you to Chain up to 7 Axle Homing Shots in all.
-
That said, if any of your Axle Homing Shots miss, you will pause via Multi-Kick...
-
All Multi-Kick Pauses except the very last can continue the "Seven Rounds" Chain with
/
—for now, just know that with the "Seven Rounds" mechanic, there are Live Rounds & Dud Rounds. -
"Live" Homing Chain options prior to / on the 7th:
-
/
= Axle Dive to Spinning Top (before 7th) / Axle Dive Chance (on 7th)
-
/
= Spinning Top (before 7th) / Aerial Rush (on 7th)
-
-
"Live" Multi-Kick options prior to / on the 7th:
-
/
= Axle Dive to Spinning Top (before 7th) / Axle Dive Chance (on 7th)
-
/
= Continue Flying Snake (before 7th) / Aerial Rush (on 7th)
-
/
= Spinning Top (before 7th) / Aerial Rush (on 7th)
-
-
"Live" Axle Shot options prior to / on the 7th:
-
/
= Axle Dive to Spinning Top (before 7th) / Axle Dive Chance (on 7th)
-
/
= Tyhpoon Combo (1st UI)
-
/
= Continue Flying Snake (before 7th) / Aerial Rush (on 7th)
-
/
= Spinning Top (before 7th) / Aerial Rush (on 7th)
-
-
"Dud" Homing Chain options:
-
/
and
/
= Flying Double-Punch Crush Finisher
-
-
"Dud" Multi-Kick & Axle Shot options (prior to the 7th)
-
/
,
/
and
/
= Flying Double Punch-Crush Finisher
-
/
= Continue Flying Snake (before 7th) / Aerial Rush (on 7th)
-
-
/
= Spinning Ricochet Kick Lv. 3
-
Since the Spinning R-Kick has completed its purpose, this will lead into the second of the 3 Chains that use the "Seven Rounds" mechanic—this one being named as the "Spinning Top".
-
The Chain starts are soon as you land your 1st Spin Bounce, and there are 7 Spin Bounces in all. Here are your "Live" and "Dud" Round Options:
-
"Live" Spinning Top options prior to / on the 7th:
-
/
= Axle Dive to Flying Snake (before 7th) / Axle Dive Chance (on 7th)
-
/
= Flying Snake (before 7th) / Aerial Rush (on 7th)
-
-
"Dud" Spinning Top options prior to the 7th:
-
/
and
/
= Flying Double-Punch Crush Finisher
-
Extra (EX) Ricochet Mode - The Cap
Simply put, "EX Ricochet Mode" counts as the singular additional "restart" of the Ricochet System, should you:
-
Use the Ricochet Kick after Ricochet Lv. 2's Multi-Kick itself, or Multi-Kick options.
-
The latter referring to Rising Sweep & Crossing Windmill when in the Ricochet System specifically!
-
-
Use Axle Dive Lv. 2 on Ricochet Lv. 3, or...
-
Use Axle Dive Chance on the 7th Round of either Flying Snake or Spinning Top.
-
This type of Axle Dive can lead to an Uncurled Axle Bound on-hit, allowing you to yet again be in EX Ricochet Mode with the
/
button.
- However, MISSING this just leads to Hopping Fish playing out and ending the Ricochet System.
-
During this mode, your input choices during all Bounces are cut in half (4 → 2), and only serve the purpose of extending your EX Ricochet Level's reach.
-
/
= Hopping Fish (short-range extension)
-
If on-miss, you'll simply go into Hopping Fish's usual recovery attacks that you see with 7-Rounds—ending EX Ricochet Mode.
-
-
/
= Spinning Ricochet Kick (long-range extension)
-
If on-miss, you'll retain the opportunity to stay in EX Ricochet Mode via the Idle Spin until you hit something.
- Though if you land on the ground, then that's the end of EX Ricochet Mode.
-
ONLY on the 3rd EX Ricochet Level can you then use:
-
/
= Flying Snake
-
/
= Spinning Top
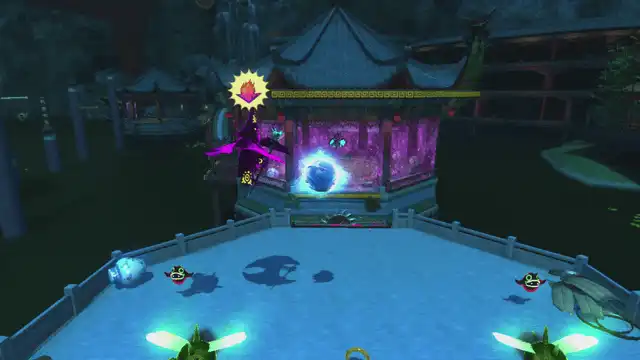
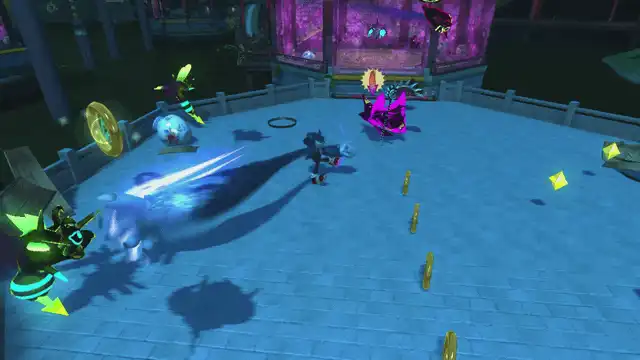
Axle Traversal System
If the Axle Homing Shot ever misses its foe(s), or if you see a slide on the ground... You can expect to go into the Axle Traversal System (ATS).
Ways to access ATS...
-
ANY time you see a specific type of slide w/ an effect, that is the Axle Slide.
-
To initiate the Axle Jump, try pressing
/
on:-
2nd UI Rolling Kick
-
2nd UI Double Kick
-
Missing an on-hit Were-Shot and rebounding from the ground
-
-
You can also press
/
on:-
Any of the last 3 inputs of Wild Whirl / Were-Hammer (after Axle Slide)
-
Rolling Kick Finisher
-
Double Kick Finisher
-
Either of the first 2 inputs of Egg Scrambler / Donkey Kick (after Axle Slide)
-
Double Axle Combo (on-miss)
-
Were-Claw Charge
- Time a Hold
/
press at the beginning to immediately activate.
- Time a Hold
-
Triple Wild Claw
- Time a Hold
/
press at the beginning to immediately activate.
- Time a Hold
-
During the Rolling action of Stallion Stampede / Meteor Kick / Dragoon's Doom
-
-
-
The Axle Slide can also initiate after a dormant Axle Ricochet bounce (as in you do nothing during that).
-
To perform Axle Traversal , repeatedly press the
/
button after an Axle Jump—this should lead to a sequence of Axle Kick >> Axle Slide >> Axle Jump >> repeat. -
There may be instances during combat / exploration where the Werehog would go into free-fall during the Dive-Kick via sliding off an enemy's model or oddly-sized object collision...
- Unfortunately, that is one of many weird quirks with Sonic Unleashed I wish we could do without LOL.
-
-
The Axle Slide in of itself also has a few options for the
/
,
/
, and
/
inputs:-
/
= 1st UI Rolling Kick
-
/
= 1st UI Double Kick
-
/
= Spinning Were-Clap (moveable)
-
If you also wish to do this move during regular combos...
-
Hold
/
around the start of 3rd UI Wild Whirl -
Hold
/
during the Rolling Kick Finisher -
Hold
/
around the ending to 1st UI Double Axle
-
-
-
While in the Axle Traversal System [ATS], here's how you can go into the Ricochet System from there: (The following must be done during an Axle Slash, which is
/
;
/
; or
/
after doing an Axle Jump)
-
Pressing
/
during the Axle Slash leads to an Axle Homing Shot.-
Pressing
/
(Axle Homing Shot / AHS) or
/
(Ricochet Kick / RK) after the 2nd unique input (UI) of Crossing Windmill will get you into Axle Ricochet, if connected.-
Crossing Windmill (*w/ Axle Slash):
-
AHS:
*
→
→
/
*
→
→
-
RK:
*
→
→
/
*
→
→
-
-
-
Pressing
/
(Axle Dive) or
/
(Ricochet Kick) after the 2nd UI of Rising Sweep will get you into Axle Ricochet, if connected.-
Rising Sweep (*w/ Axle Slash):
-
AHS:
*
→
→
/
*
→
→
- Holding
/
during the later part of the 2nd UI leads to Axle Dive Lv. 2
- Holding
-
RK:
*
→
→
/
*
→
→
-
-
-
Pressing
/
after the Axle Slash will activate the Ricochet Kick—if it connects, you will be in Axle Ricochet.
-
Lesser Unleash State & Greater Unleash State
Now, when going into Unleash Mode, there are two states to concern yourself with: Lesser & Greater Unleash.
Simply put:
-
Lesser Unleash is slower, yet has access to Axle Traversal combos that CAN send you into Greater Unleash.
-
Axle Homing Shot Mode, after on-hit Ricochet:
-
/
= Unleashed Axle Dive Lv. 1
-
/
= Crossing Windmill
-
Continuously mashing
/
will lead to a slightly longer Multi-Kick Pause...-
During this Pause, ALL buttons lead back to a regular Axle Homing Shot.
-
If you manage to land this Multi-Kick on an enemy, it leads to the same on-hit outcome as SSK.
-
-
-
/
= Lesser Axle Shot (Forwards)
-
/
= State Switch Kick
-
If connected with an enemy, the game will slow down & your Axle Shot options will upgrade in speed (x2).
-
Multi-Kick acts as a chance to refresh Greater Unleash w/ the SSK.
-
-
-
Axle Homing Shot Mode, after an Axle Rebound from the ground:
-
/
= Rising Sweep
- Continuously mashing
/
will lead to a slightly longer Multi-Kick Pause...
- During this Pause, ALL buttons lead back to a regular Axle Homing Shot.
- If you manage to land this Multi-Kick on an enemy, it leads to the same on-hit outcome as SSK.
- Continuously mashing
-
/
= Crossing Windmill
- Continuously mashing
/
will lead to a slightly longer Multi-Kick Pause...
- During this Pause, ALL buttons lead back to a regular Axle Homing Shot.
- If you manage to land this Multi-Kick on an enemy, it leads to the same on-hit outcome as SSK.
- Continuously mashing
-
/
= Lesser Axle Shot (Forwards)
-
/
= State Switch Kick
- Is less steep in verticality & slower than Greater Unleash Kick.
- If connected with an enemy, the game will slow down temporarily (not always constant if you're fast enough) & your Axle Shot options will upgrade in 2x speed.
- Multi-Kick acts as a chance to refresh Greater Unleash w/ the SSK.
- Acts as Slide-less "Axle Traversal" on-landing.
-
-
-
Greater Unleash is VERY fast, very easy to lose & has no access to Axle Traversal attacks.
-
Axle Homing Shot Mode, after on-hit State Switch Kick :
-
/
= Unleashed Axle Dive Lv. 2
- Has a camera & game speed indicator on-hit.
- Hitting Y after you connect a hit activates the 1st UI of Rising Sweep, giving you a breather & chance to do State Switch Kick.
-
/
= Greater Unleash Kick
- Is steeper in verticality & faster than the State Switch Kick.
- If connected with an enemy, you will maintain Greater Unleash w/ no slo-mo (has camera zoom out for indication).
- Multi-Kick acts as a chance to refresh Greater Unleash w/ the SSK.
-
/
= Greater Axle Shot (Forwards)
-
/
= Greater Axle Shot (Backwards)
-
The third & final move of the 3 Chains that make use of the "Seven Rounds" mechanic—this one simply named as "The Ladder". The mechanic kicks in the moment you start hit this button after the result of SSK (as in after the slow-mo).
-
Repeatedly hitting the
/
button will send you & your target upwards for up to 7 times.
-
"Live" Homing Chain options:
-
/
= Unleashed Axle Dive Lv. 2
-
/
= Greater Unleash Kick
-
-
"Live" Axle Shot options prior to / on the 7th:
-
/
= Unleashed Axle Dive Lv. 2
-
/
= Greater Unleash Kick
-
/
= Greater Axle Shot (Forwards)
-
/
= Continue The Ladder (before 7th) / Unleashed Axle Dive Lv. 2 (on 7th)
-
-
"Dud" Homing Chain options:
-
/
and
/
= Flying Double-Punch Crush Finisher
-
-
"Dud" Axle Shot options (prior to the 7th)
-
/
,
/
and
/
= Flying Double Punch-Crush Finisher
-
/
= Continue The Ladder (before 7th)
-
-
-
In Greater Unleash, the Kick switching to the
/
button is pretty much prevent spamming the
/
button for the same move—since both G-Unleash Kick & G-Axle Shot lead to a backwards outcome, it's better to let you experience the speeds of the Greater Unleash State sooner w/ a Sped Up Axle Homing Shot. -
If you manage to maintain Greater Unleash when the Unleash Meter runs out, you'll be in a state similar to the activatable Team Blast in Sonic Heroes —in other words, so long as you can keep it up, you can keep doing Greater Unleash Mode actions as base Werehog. - ini
-
Understanding the "Seven Rounds" Mechanic
![]()
The "Seven Rounds" (7-Rounds) mechanic was created as a way to both allow for long-Chain moves that still had caveats to the Chain(s) as a whole—all while allowing for clever combo play and rewarding those who pay attention to their chain all at the same time.
If you wish to simply maintain an on-going Chain, 7-Rounds won't interrupt that—yet if you want to be able to make use of OTHER options while inside the Chain...
YOU need to understand why "Live" Rounds & "Dud" Rounds exist within 7-Rounds.
-
As you recall, the Axle Shot Network contains THREE Chains that are bound to 7-Rounds:
-
The Flying Snake,
-
The Spinning Top, and...
-
The Ladder (accessible only in Unleash ASN).
-
Based on what you can infer by what each Chain's Live & Dud Rounds do, there's a clear pattern...
Here's the deal with that, as this will be THE most "figure-it-out" aspect of ASN a whole:
-
Live Rounds provide additional combo opportunities within a Chain; Dud Rounds end the Chain(s) entirely.
-
All Dud Rounds for all 7-Rounds Chains are consistent in the attack used for ending them.
-
The number of Dud Rounds for all 7-Rounds Chains are greater than Live Rounds.
-
The positions of each Live Round in the 7-Rounds Chains are consistent.
-
For Base ASN: Live Rounds of a 7-Rounds Chain can act as "teleports" or "skips" to future Live Round positions of ANOTHER 7-Rounds Chain, and let you continue that Chain—as per FIS rules, with a twist.
-
For fun—if you manage to figure out the position numbers of each Live Round in any of the 7-Rounds Chains, finding the digital root of the combined numbers confirms the number of Live Rounds in all 7-Rounds Chains.
With that—have fun figuring out the positions of each Live Round in the three (3) "Seven Rounds" Chains!
This was essentially my way of trying to figure out a cool balancing system of loopable moves, and this felt great to concept & implement. - ini
One last thing...
Make sure to be mindful of your surroundings while in this form of play—your skills in improvisation WILL be put to the test !!
Other than that— have a blast "logging into" the Axle Shot Network . - ini
Usage Credits:
-
All Xbox & PlayStation controller button images by Victor Pines:
- VictorPines, CC BY-SA 4.0, via Wikimedia Commons
- Xbox Controller Buttons
- PlayStation Controller Buttons